Marketo Auto
A gearbox oil pipe rarely fails without clues. A pale, wet ring around a fitting, a dark streak beneath a clamp, or oil collecting on a casing may point to seepage. But what causes a gearbox oil pipe to sweat or seep? The answer can involve loose connections, aged seals, vibration, pressure changes, or a damaged pipe surface. Sometimes, the apparent leak comes from oil running down from a higher component. The source is not always where the stain appears.
In this illustrative introduction, fictional gearbox-maintenance specialist Alex Morgan offers a practical reminder: “A clean pipe tells you more than a fresh smear.” That is a useful inspection habit, not a verified quotation from a real expert. Wipe the pipe and fittings clean, then inspect again after the gearbox has operated under normal conditions. Look closely at joints, bends, support brackets, and areas where vibration may rub the pipe against nearby metal. A small bead returning at one connection suggests a different problem from oil spread across the casing.
A faint sheen matters. So does context. Oil viscosity, operating temperature, installation alignment, and maintenance history can all affect what you see. Avoid tightening fittings blindly; excessive force can damage threads or seals and make seepage worse. Also, a dry-looking pipe does not prove the system is sound. This guide explains the common causes, practical checks, and signs that call for qualified service. One limitation remains: visual inspection alone cannot confirm internal pressure or identify every hidden failure.
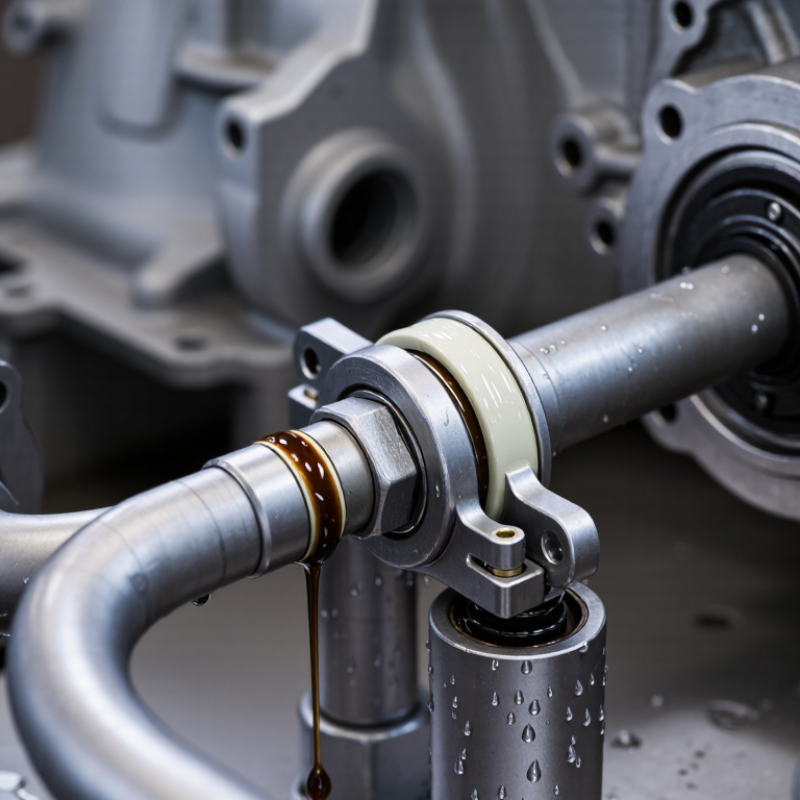
A gearbox oil pipe that is sweating usually shows a thin, glossy film around a joint, clamp, or crimp. It may collect dust and turn into a dark, sticky ring. Seepage looks more active: a fresh wet trail forms below the fitting, or a drop slowly gathers at its lowest edge. Look closely. A dry stain can be old residue, not a current leak. Wipe the area clean, then inspect it again after operation, taking care around hot or moving parts.
Oil can spread along a pipe, so the wettest point is not always the source. Check the joint, nearby seals, and pipe surface under good light. A small seep may reflect a loose connection, vibration, a damaged seal, or pressure changes; appearance alone cannot confirm the cause. The U.S. Department of Energy’s Operations & Maintenance Best Practices Guide reports that predictive maintenance can save 8–12% over preventive maintenance. That figure covers maintenance programs broadly, not gearbox pipes specifically, but it supports tracking small changes before they worsen. Small clues matter. Record where the oil appears, how quickly it returns, and whether the patch grows between checks.
A gearbox oil pipe may sweat when a joint, seal, or pipe wall no longer holds pressure. Vibration can gradually loosen threaded fittings, especially near the pump or gearbox housing. A thin, wet ring around a connection is an early clue. Don’t dismiss it. Gasket material can harden with heat and age, while corrosion or rubbing against a bracket can thin the pipe. Repeated temperature changes also make joints expand and contract. In some systems, a blocked breather or overfilled housing raises internal pressure and pushes oil past otherwise serviceable seals.
The pattern helps narrow the cause. Oil concentrated at one fitting suggests a loose connection or damaged sealing surface; a streak along the pipe may indicate abrasion or a pinhole. Clean the area, check the oil level, then inspect again after operation. Avoid tightening blindly: excess force can damage threads or distort a seal.
The U.S. Department of Energy’s Operations & Maintenance Best Practices Guide (2010) estimates that operations and maintenance can represent 15–40% of production costs in manufacturing. That figure is not specific to oil leaks, but it shows why small maintenance issues deserve attention.
A little seepage can become a bigger repair.
What Causes a Gearbox Oil Pipe to Sweat or Seep?
How to Inspect the Pipe and Identify the Leak Source
Start with a clean, dry pipe. Wipe it from the gearbox connection to the next fitting, then inspect the surface under bright light. Look for fresh oil at welds, threaded joints, clamps, bends, and rubbed areas. The highest wet point often provides a better clue than the largest oil stain. Oil can travel along a pipe before dripping elsewhere. A first wipe can mislead; recheck after a short, controlled run.
Check for loose fittings, cracked coatings, vibration marks, and flattened or corroded pipe sections. Note whether oil appears only when the gearbox is warm or running. Do not tighten a hot or pressurized connection. The U.S. Department of Energy’s 2010 Operations & Maintenance Best Practices Guide reports that predictive maintenance can reduce maintenance costs by 25–30% and breakdowns by 70–75%. Those figures support systematic checks, not a guarantee that inspection alone will prevent failure.
Tips: Photograph the dry pipe, mark the first wet spot, and inspect again after operation. If oil returns at a joint, confirm the fitting and seal condition before replacing the pipe.
| Observed Condition | Possible Leak Source | How to Inspect | Clues That Help Confirm the Source | Practical Next Step |
|---|---|---|---|---|
| Light oily film with no visible drops | Minor seepage at a threaded connection, flare seat, or pipe fitting | Clean and dry the area, then inspect it again after the equipment has operated and cooled. Use a light to check the full circumference of the joint. | A fresh, localized film reappears at the joint while the surrounding pipe stays dry. | Check that the fitting is correctly seated and supported. Tighten only to the equipment maker’s specified procedure and torque; do not overtighten. |
| Oil bead forming at a joint or fitting | Loose connection, damaged sealing washer or O-ring, or a worn sealing face | Wipe the joint clean and trace where the first new bead forms. If safe and permitted, inspect the seal after isolating the equipment and relieving pressure. | The bead begins at the seal interface rather than on the middle of the pipe. | Replace a damaged seal with the correct type and size. Inspect mating surfaces for scratches, distortion, or contamination before reassembly. |
| Wet streak running along the pipe | Leak higher up the pipe, with oil tracking along the surface by gravity or vibration | Clean the pipe from end to end, including brackets and nearby components. Recheck from the highest point downward. | The uppermost fresh wet point is often closer to the source than the lowest drip or stain. | Repair the actual source rather than sealing the bottom of the streak. Check nearby fittings and seals as well as the pipe itself. |
| Oil emerging from a pinhole, crack, or rubbed area | Pipe corrosion, fatigue cracking, abrasion, or contact with another part | Inspect the full pipe length and areas hidden by clamps or guards. Look for rust, dents, flattened sections, polished rub marks, and cracks. | A leak originates on the pipe body rather than at a connection; surrounding surfaces may show repeated contact or vibration marks. | Replace a damaged pipe with the specified part. Correct the cause of rubbing or vibration and restore suitable support and clearance. |
| Leak appears mainly when the gearbox is running or hot | Pressure-dependent seepage, thermal expansion at a joint, or a seal that leaks under operating conditions | Compare the clean, dry assembly before operation with its condition after a normal operating cycle. Keep clear of hot surfaces and moving parts. | No fresh oil is visible while stopped, but a new wet point appears during or shortly after operation. | Follow the manufacturer’s inspection procedure. Do not loosen a line while the system is hot or pressurized. |
| Oil around a pipe connection, but the pipe appears dry | Leak from an adjacent shaft seal, cover gasket, breather, or higher component | Clean the pipe and nearby gearbox surfaces separately. Inspect above the connection and trace the first area where oil returns. | Oil reaches the pipe from another surface; the fitting itself remains dry after cleaning. | Inspect the adjacent component and gearbox venting. Avoid replacing the pipe unless its own surface or connection is confirmed to leak. |
| Recurring leak after a fitting has been tightened | Cross-threading, incorrect fitting, damaged threads, poor alignment, or an unsuitable sealant | When the equipment is safely isolated and depressurized, inspect thread engagement, alignment, fitting type, and sealing method against the service information. | The connection will not seat squarely, threads show damage, or the leak returns despite correct assembly steps. | Replace damaged components and use the specified sealing method. Do not use excess sealant, which can enter and obstruct an oil passage. |
| Oil collects at a bracket or clamp | Leak hidden beneath a support, or pipe damage caused by a tight, loose, or mispositioned clamp | Inspect both sides of the support and the pipe surface beneath it. Check for trapped debris, corrosion, movement, or sharp edges. | The pipe is wet or marked only at the support, or oil is trapped where the pipe meets the clamp. | Replace a damaged pipe or worn support, remove trapped debris, and position the clamp so it supports the line without pinching it. |
Inspection note: “Sweating” usually describes a thin oil film, while “seeping” means fresh oil is visibly forming or moving. Clean the area before diagnosis, check the gearbox oil level, and use the equipment service instructions. Isolate the machine and allow hot components to cool before handling any pipe or fitting.
What Causes a Gearbox Oil Pipe to Sweat or Seep?
When Oil Seepage Becomes a Mechanical Risk
A light oil film around a gearbox pipe may come from a loose fitting, a hardened seal, vibration, or a rubbed line. A damp surface is not always an emergency. But fresh drops, a growing stain, or oil collecting beneath the gearbox deserve attention. Small losses can lower the lubricant level over time, while escaping oil may attract dust that hides cracks and loose connections. That matters.
The mechanical risk rises when the oil level falls or the leak reaches hot surfaces. Inadequate lubrication can increase friction, temperature, and wear on gears and bearings. Watch for unusual noise, rising operating temperature, or rougher running. These signs do not prove the pipe is the cause; they do mean the equipment needs assessment. A clean-looking gearbox can still be losing oil slowly, so visual checks alone can miss the trend.
Tips: With equipment safely stopped and isolated, wipe the pipe and fitting clean, then check again for fresh oil. Inspect for cracked hose, damaged threads, loose supports, and contact marks from vibration. Check the oil level using the equipment maker’s procedure, and record changes. Don’t tighten fittings blindly; overtightening can damage threads or seals. If seepage returns or the level drops, arrange a qualified inspection before continued operation makes the damage worse.
Even a slow seep can add up. This chart estimates 30-day oil loss at constant leak rates; falling oil level can reduce lubrication and increase heat and wear.
Illustrative calculations, not universal leak thresholds: daily loss is multiplied by 30. Actual risk depends on gearbox capacity, operating conditions, oil level, and the equipment manufacturer's limits. Check the oil level and investigate recurring seepage, especially around joints, seals, and pipe connections.
What Causes a Gearbox Oil Pipe to Sweat or Seep? Repair and Prevention for Gearbox Oil Pipe Leaks
A damp ring around a gearbox pipe joint can signal a loose fitting, damaged seal, cracked tube, or vibration fatigue. Oil may also travel along a pipe, making the leak appear farther from its source. Clean the area, dry it, then inspect after operation to trace the first fresh oil mark. Do not tighten a live, pressurized connection. Stop and isolate the equipment first. Sometimes, the first repair is not the right one.
Repair should match the cause. Replace hardened seals and visibly damaged pipes; check threads and mating surfaces before fitting new parts. Tighten connections to the equipment maker’s specified torque, not by feel alone. Support long pipe runs and check clamps, alignment, and nearby vibration sources. After repair, refill with the specified lubricant if needed, then run the gearbox and inspect for fresh seepage. Keep a record of the location and repair. It helps reveal repeat failures.
Tips: Use a clean, lint-free cloth to remove oil before inspection. Avoid sealant unless the connection design calls for it. The U.S. Department of Energy’s Operations & Maintenance Best Practices guide reports that effective maintenance programs may save 5–20% compared with reactive maintenance; it is a broad benchmark, not a promised gearbox-leak saving. A small leak deserves attention. Wait too long, and oil loss or contamination may complicate the repair.
Wipe it dry from the gearbox connection to the next fitting. Use bright light to check welds, joints, clamps, bends, and rubbed areas. Wait briefly, then inspect again.
Check the highest fresh wet spot first. Oil can travel along a pipe before dripping elsewhere, so the largest stain may be misleading.
Common causes include loose fittings, hardened seals, vibration, damaged threads, or a line rubbing against nearby parts. Sometimes the cause is not obvious.
Not always. But fresh drops, a growing stain, or oil collecting beneath the gearbox deserves attention. Small leaks can lower the oil level over time.
Watch for falling oil levels, unusual noise, higher operating temperatures, or rougher running. These signs need assessment, though they do not prove the pipe is responsible.
No. Do not tighten a hot or pressurized connection. Overtightening can damage threads or seals.
Photograph the dry pipe, mark the first wet spot, and note when oil returns. Record oil-level changes, too. I could still miss a slow leak.
Arrange one if seepage returns, the oil level drops, or you find cracked hose, damaged threads, or vibration marks. Stop and isolate equipment before checking it.
What causes a gearbox oil pipe to sweat or seep? In many cases, the source is a loose connection, a worn seal, a cracked or corroded pipe, or damage caused by vibration, heat, or contact with nearby components. A light oily film around a joint may indicate early seepage, while fresh drops or a growing wet patch suggest a more active leak. Cleaning the area and checking it again after the gearbox has run can help reveal where the oil is escaping.
Oil seepage should not be ignored. Low oil levels can reduce lubrication, increase heat, and contribute to premature wear or mechanical failure. Inspect the pipe, fittings, seals, and surrounding surfaces, while following safe procedures and allowing hot components to cool. Repair may involve tightening a connection or replacing a damaged seal or pipe. Regular checks, correct installation, and attention to vibration or rubbing can help prevent leaks from returning.