China Top 10 Coolant Hose Removal Without Radiator Damage?

Time:2026-11-11 Author:Sophia
0%

A stuck coolant hose may look like a simple maintenance problem, but careless leverage can crack a radiator neck or damage a plastic tank. This guide explores practical ways to loosen a hose while keeping the radiator intact. The key question is: “How to remove a stuck coolant hose without damaging the radiator”? Begin only when the engine is completely cool, and relieve pressure according to the vehicle manufacturer’s instructions. A hot cooling system can spray scalding fluid. Not worth the risk.

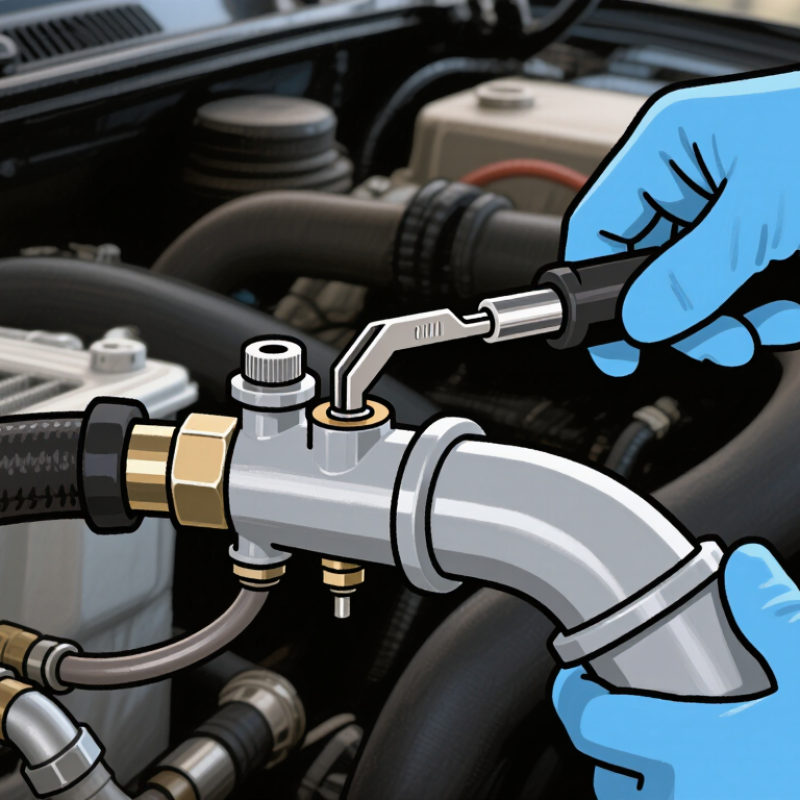
The methods in this China-focused top 10 guide emphasize controlled movement, suitable hose-removal tools, and careful inspection rather than force. First, check the clamp and surrounding parts. Then try gently twisting the hose to break its seal. If it remains bonded, a dedicated hose pick may help, but keep its tip away from the radiator connection. Avoid levering against a delicate neck with a screwdriver. That shortcut can become an expensive repair. Hose age, material, access, and radiator design all affect the safest approach, so one technique will not suit every vehicle. I’ve seen stubborn hoses resist patient handling; more force is not always the answer. Stop if the neck flexes, cracks, or begins to deform, and consult the service manual or a qualified technician. After removal, inspect the connection for damage before fitting a replacement hose and clamp.
China Top 10 Coolant Hose Removal Without Radiator Damage?

Identify the Coolant Hose Type and Its Radiator Connection

Before removing a coolant hose, identify both the hose construction and its radiator connection. SAE J20, the industry specification for coolant-system hoses, evaluates hose performance under temperature, pressure, and coolant exposure. That matters because a reinforced radiator hose may resist twisting, while an aged rubber hose can split when pried from a neck. Look for a spring clamp, screw clamp, or quick-connect fitting. Check the radiator neck for a raised retaining bead, plastic locking tabs, or signs of brittleness. Small details change the safest removal method.

Let the engine cool completely, then drain enough coolant to keep the joint below the hose opening. With a spring clamp, squeeze the ears and slide it back along the hose. For a stuck hose, gently rotate it near the connection to break the seal; do not lever against a plastic radiator tank. A blunt hose-removal tool can help, but stop if the neck flexes or cracks. Quick-connect fittings usually need their lock released before the fitting is pulled straight off. No twisting force. I would inspect the clamp and hose end before reuse; they may look fine while hiding corrosion or a flattened seal. SAE J20 is a useful performance reference, not a guarantee that every hose fits every radiator connection.

Let the Engine Cool and Relieve Cooling-System Pressure

Let the engine cool completely before touching any coolant hose. Not just warm. A hot system can hold pressure and send scalding coolant out when its cap is opened. Wait longer. Once fully cold, cover the radiator or pressurized expansion-tank cap with a thick cloth. Turn it slowly to its first stop, if the cap has one, then pause. If you hear a hiss, stop and wait until it ends. Never force the cap or open it on a warm engine. A quiet cap is not a substitute for letting the engine cool fully.

Before loosening the hose, drain coolant below its connection into a clean catch pan. Release the clamp with suitable pliers and slide it back along the hose. Twist the hose gently to break its grip; do not lever a screwdriver against the radiator neck. Plastic necks can crack, even when they look sturdy. If the hose is stuck, carefully work a purpose-made hose pick around its edge, keeping the tool away from the fitting. Hands slip. That is worth remembering. I still find it tempting to rush a stubborn hose, but stopping to reassess is cheaper than replacing a damaged radiator.

Position Tools and Release the Hose Clamp Carefully

Work only on a completely cool engine. Hot coolant can cause severe burns, and pressure may remain in the system. Place a drain pan below the hose connection and keep a clean cloth nearby. A small flashlight helps you see whether the clamp sits behind the raised bead on the radiator neck.

Choose pliers that match the clamp. For a spring clamp, grip its tabs squarely and compress them steadily; do not twist the pliers against the radiator. Slide the clamp back along the hose, clear of the neck. For a screw clamp, loosen the screw until the band moves freely. Keep the tool aligned with the screw head. A slipping tool can gouge nearby plastic.

Now support the hose close to the fitting and rotate it gently to break the seal. Avoid pulling hard or levering a screwdriver against the radiator neck. That neck can crack, even when it looks sturdy. If the hose will not turn, use a suitable hose-removal pick carefully around the edge, keeping its tip away from the sealing surface. Pause and check for a hidden clip or corrosion. It is easy to rush here. If the fitting flexes or coolant remains trapped, stop and reassess rather than forcing it; a damaged connection may leak after reassembly.

Loosen and Remove the Hose Without Twisting the Radiator Neck

With the engine fully cold, release the cooling-system pressure before touching the hose. A warm system can spray hot coolant when opened. SAE J20, the automotive coolant-hose performance standard, includes tests for pressure resistance, fluid compatibility, and aging. That matters during removal: a hose may feel firm yet cling tightly to a radiator neck after heat cycles. Do not use the hose as a lever.

Clear nearby parts, then rotate the hose gently in both directions to break the seal. Keep the force close to the hose end, not on the radiator neck. If it will not move, use a blunt hose-pick tool to separate the rubber lip from the fitting. ASTM D471 measures rubber changes after liquid exposure, including changes in volume and tensile properties; aged rubber can therefore grip differently from a new hose. Stop if the neck begins to flex. Small movement is enough. A careful hand can still misjudge it.

Once the seal releases, pull the hose straight off while supporting the neck, and inspect the fitting for cracks, corrosion, or a raised edge before installation.

Inspect the Hose, Clamp, and Radiator Fitting for Damage

Before removing a coolant hose, let the engine cool completely and place a catch pan beneath the connection. Hot coolant can cause serious burns. Check the hose for swelling, cracks, soft spots, or dried coolant around its end. A crusty green or white ring may signal a slow leak. Look closely at the clamp, too. Rust, a bent band, or a stripped screw can make it difficult to release safely.

Inspect the radiator fitting where the hose sits. Check for cracks, flattened edges, corrosion, and old sealant. Plastic fittings can become brittle with age, while metal ones may pit. A fitting that moves when you gently touch it deserves extra care. Do not twist the hose hard against it. That force can turn a simple removal into a radiator repair.

Once the clamp is loose, rotate the hose gently to break its grip. If it will not move, use a suitable hose-removal tool rather than levering against the fitting with a screwdriver. Stop if the fitting flexes or the hose is fused in place. I sometimes find that a hose looks sound until it comes off; that is a useful reminder to inspect the inside edge, not just the visible surface. Replace damaged parts before reconnecting, and seat the clamp behind the fitting’s raised bead.

Coolant Hose Removal: Pre-Removal Inspection Checks

Check the hose, clamp, and radiator fitting before loosening the connection.

The chart counts practical inspection points, not measured failure rates. Look for hose cracks, swelling, hardening, or leakage; clamp corrosion, deformation, or incorrect position; and fitting cracks, corrosion, damage, or coolant residue. Work only when the cooling system is cool, and avoid twisting or prying against the radiator fitting.

FAQS

How cool should the engine be before removing a coolant hose?

Let it cool completely. A warm engine can still hold dangerous pressure.

How can I safely open the cooling-system cap?

Cover the cold cap with a thick cloth. Turn it slowly to the first stop, then pause. If it hisses, wait until the sound ends. Never force it.

Should I drain coolant before loosening the hose?

Yes. Drain coolant below the hose connection into a clean catch pan.

How do I move a spring clamp?

Use suitable pliers. Grip the tabs squarely, compress them steadily, and slide the clamp back along the hose.

How do I loosen a screw clamp?

Keep the tool aligned with the screw head. Loosen it until the band moves freely.

What if the hose is stuck?

Support it near the fitting and twist gently. If needed, carefully use a hose-removal pick. Keep its tip away from the sealing surface.

Can I use a screwdriver to pry the hose off?

Avoid levering against the radiator neck. Plastic can crack. Hands slip.

When should I stop and reassess?

Stop if the fitting flexes, coolant remains trapped, or the hose will not turn. Check for a hidden clip or corrosion. I still find rushing tempting, but it can lead to leaks later.

Conclusion

Removing a coolant hose safely starts with identifying its type, locating how it connects to the radiator, and noting the clamp position. Let the engine cool completely before opening the cooling system, and relieve any remaining pressure cautiously. Prepare the correct tools and position them so you can release the clamp without pressing against or straining the radiator neck.

If you are wondering, “How to remove a stuck coolant hose without damaging the radiator,” avoid pulling hard or twisting the hose against the fitting. Gently work the hose loose with controlled movement, keeping force directed along the connection rather than sideways on the radiator neck. Once removed, inspect the hose, clamp, and radiator fitting for cracks, distortion, corrosion, or other damage. Replace worn parts before reconnecting the hose, and make sure the clamp is secure.

Sophia

Sophia

Sophia is a dedicated marketing professional with an exceptional depth of knowledge about her company's products and services. With a keen understanding of market trends and customer needs, she crafts insightful blog posts that not only inform but also engage readers, enriching the company’s online......